Title Bar (Toolbar)
At the top of the editing page, you'll find the Title Bar, which houses the toolbar. NoteIn offers two different toolbar modes: Immersive Toolbar (default) and Traditional Toolbar. The Immersive Toolbar, along with the expandable/collapsible Pen Box, maximizes the content display area. On the other hand, the Traditional Toolbar + Pen Box is fixed at the top of the screen and cannot be moved. While it may sacrifice a portion of the content display area, it provides more efficient tool switching.
- Tips: You can switch between these modes by enabling or disabling "Immersive Toolbar" in the settings.

Here's the purpose of the tools in the Title Bar:
- Back: Click to return to the main notes list page.
- Left Sidebar: Expands for split-screen operations.
- Tiled Thumbnails: Click to enter the tiled view of the notes page, allowing you to perform actions like copy, paste, move, add, delete, copy, merge, and split pages.
- Undo/Redo: Allows you to undo and redo handwriting and erasing actions.
- Finger/Pen Switch: Click to switch between finger and pen writing modes.
- Image Tool: Lets you insert images from your gallery or take photos to insert into your notes. You can also crop and free-crop images (long press on an image to enter editing mode).
- Screen Capture: Allows you to capture screen screenshots and insert them into your notes.
- Insert Page: Adds pages or covers to your document.
- Modify Template: Lets you modify the style of the current page, including paper orientation, size, grid style, and color.
- Sync: Click to synchronize data for the current document.
- Layers: Use/edit layers within your notes.
- Export Document: Choose to export the entire document or individual pages in PDF native format, flat PDF format, image format, or native format.
- Right Sidebar: Expands to show an overview of the current document's pages, outline, notes, and quick settings. You can also search within these contents.
The ToolBox
The toolbox at the bottom of the editing page is customizable and allows you to preset various tools for quick access.
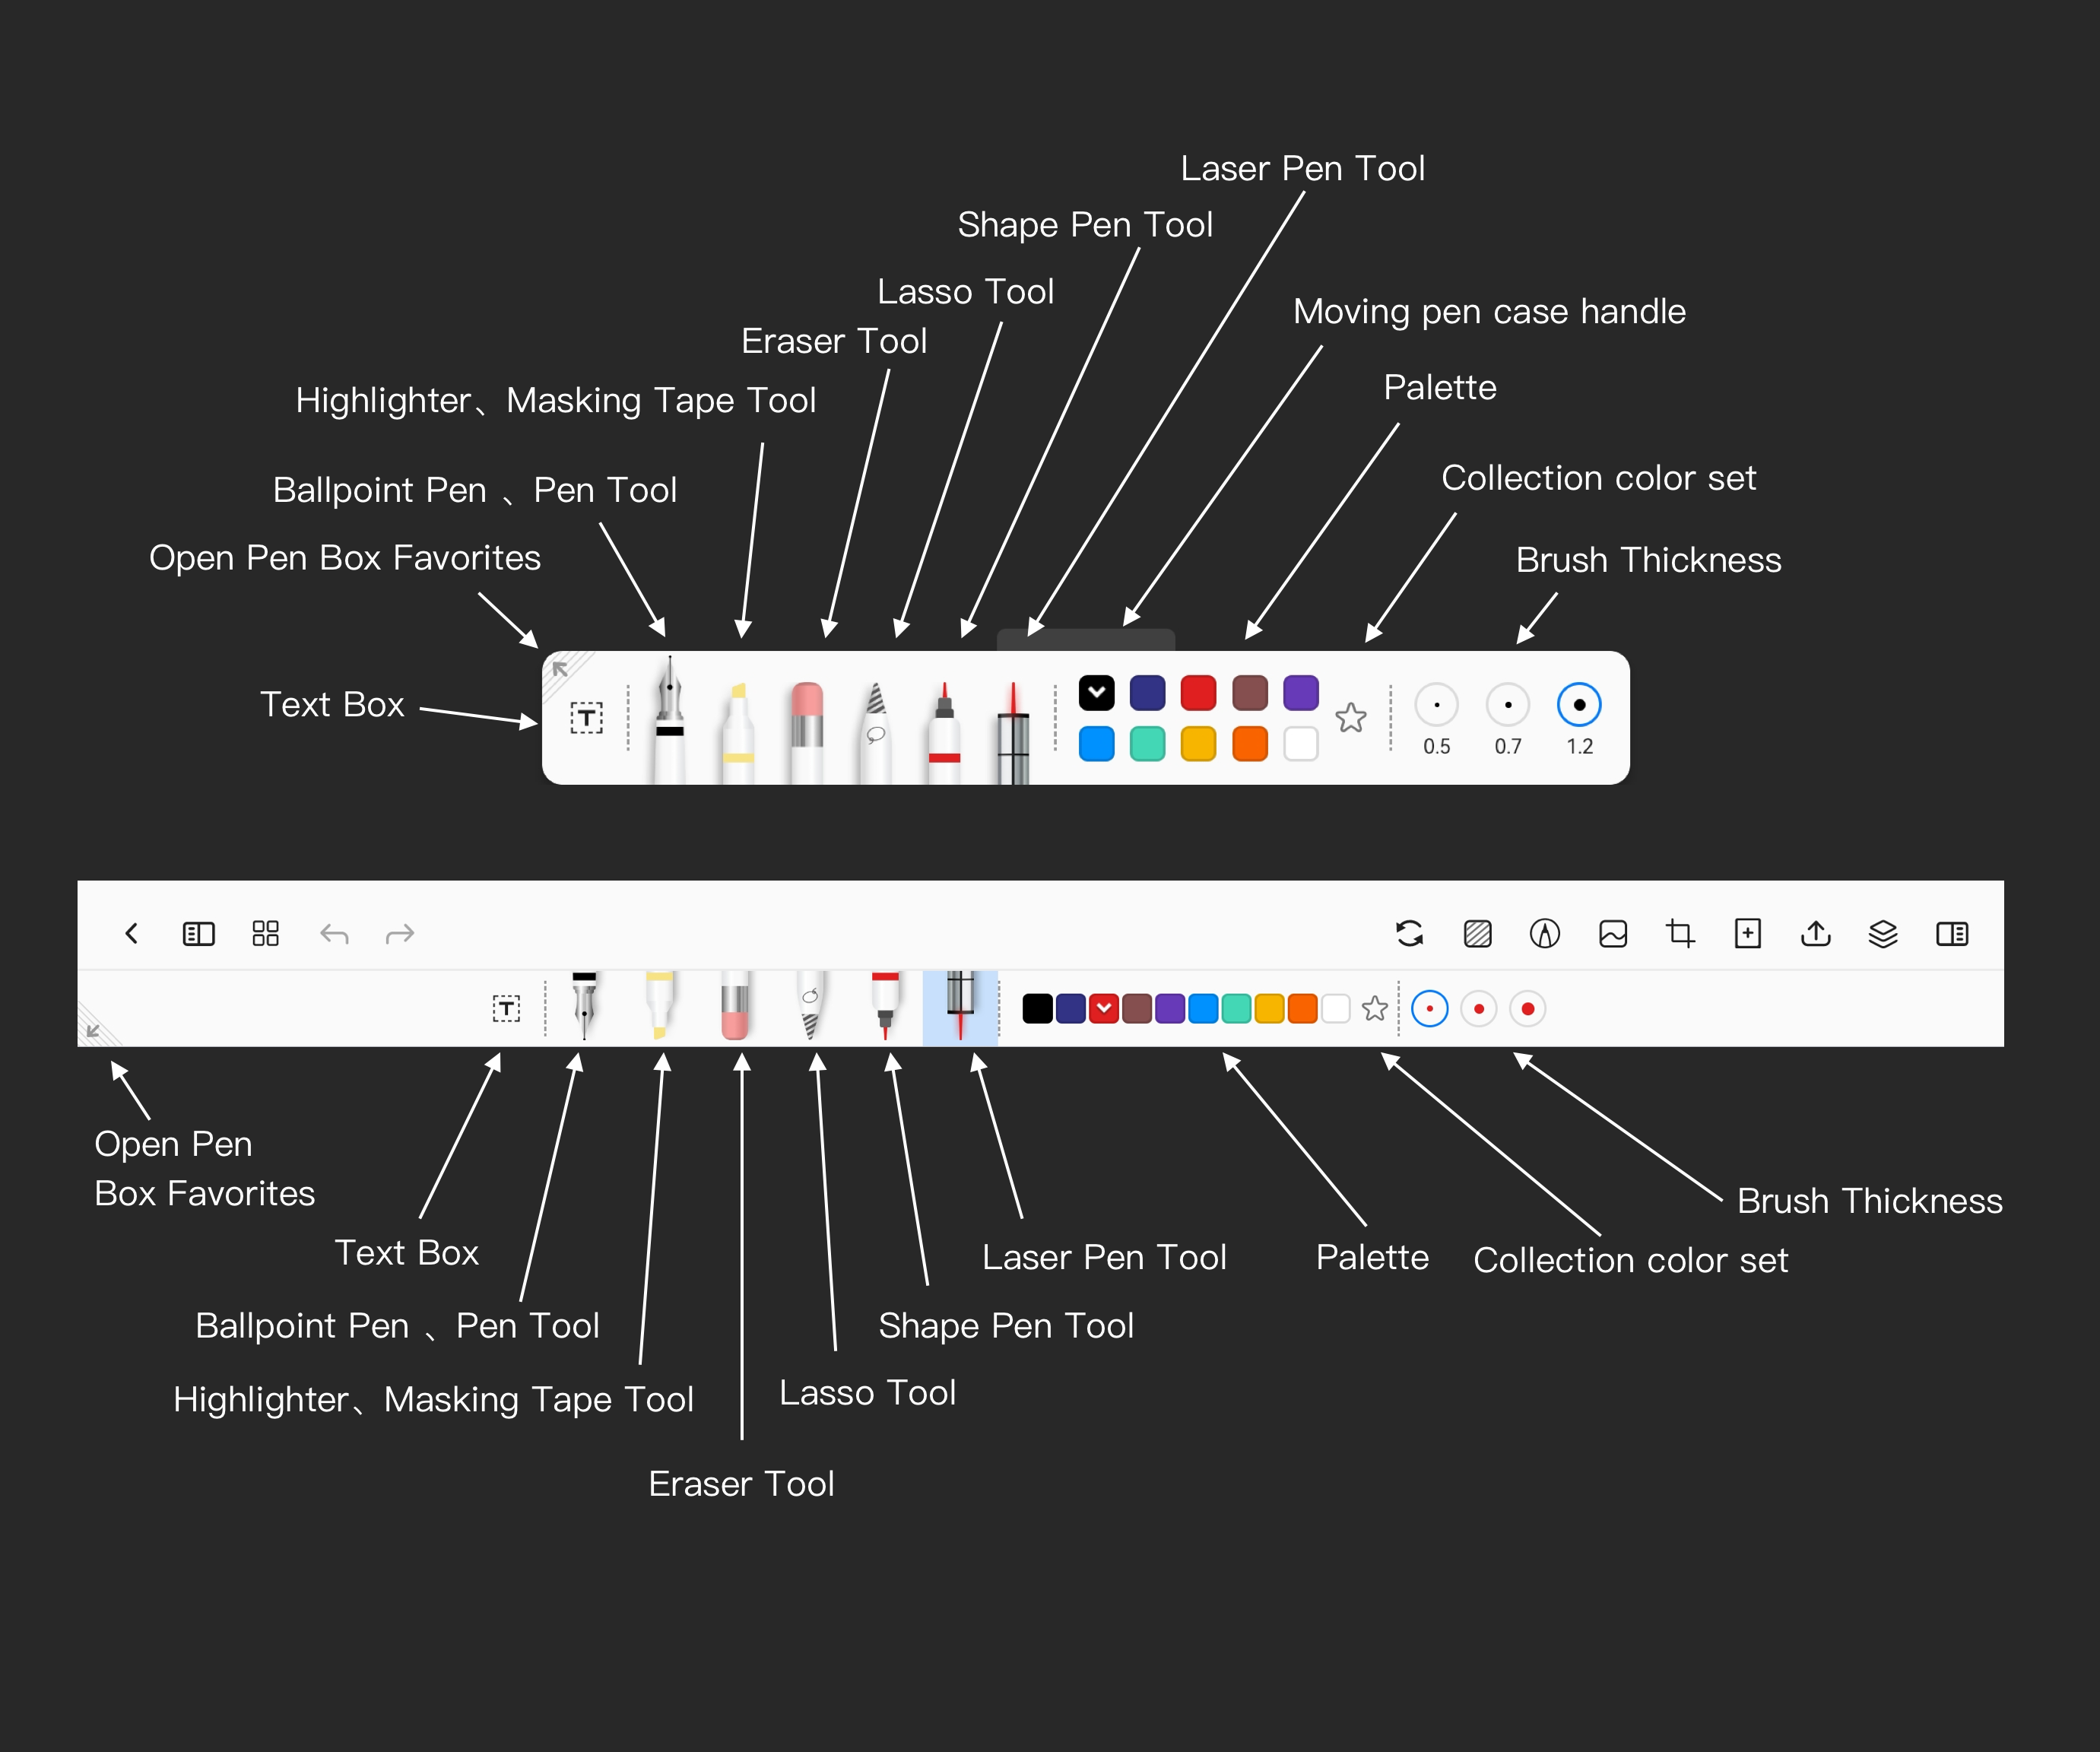
Here's the purpose of each tool in the ToolBox:
- Text Box: You can input text using the keyboard and edit text styles.
- Pen Tool: The pen tool supports pressure and ink speed adjustment, allowing you to customize parameters for your handwriting preferences.
- Ballpoint Pen Tool: The ballpoint pen tool produces consistent stroke thickness regardless of pressure.
- Highlighter Tool: The highlighter follows specific color rules, not covering black, and has color overlay effects.
- Masking Tape Tool: Allows you to draw areas that can be shown or hidden with a click.
- Eraser Tool: Provides various erasing methods, including point erasing, whole-stroke erasing, and selection erasing.
- Lasso Tool: Use "Freehand Lasso" or "Rectangle Lasso" to select objects (handwritten strokes, shapes, text boxes, images), move or edit them, or convert selected handwritten text to typed text.
- Laser Pen Tool: Typically used for presentations or annotations, it disappears after a set time and leaves no traces.
- Shape Pen Tool: Lets you quickly draw various lines and shapes, such as dashed lines, waves, arrows, function coordinates, cubes, cones, cylinders, spheres, etc. You can adjust brush color and thickness.
- Palette: Allows you to set color and opacity for different brushes. Each brush can have ten independent preset values that can be customized at any time.
- Brush Thickness: Lets you adjust the thickness of different brushes. Each brush can have three independent preset values that can be modified as needed.
The ToolBox is flexible, and you can customize it for each document. If you prefer a consistent ToolBox across all documents, you can enable the "Global ToolBox" option in the right sidebar settings.
You can place the ToolBox in a suitable location by dragging it to different directions. When you place it in the middle of the screen edge, it will be expanded. If you place it in one of the four corner positions of the screen, it will be collapsed. To expand a collapsed ToolBox, simply double-click it. Here's how you can do it:
1. Drag the ToolBox to the middle of the screen edge to expand it.
2. To collapse it, drag it to one of the four corner positions on the screen.
3. To expand a collapsed ToolBox, double-click on it.
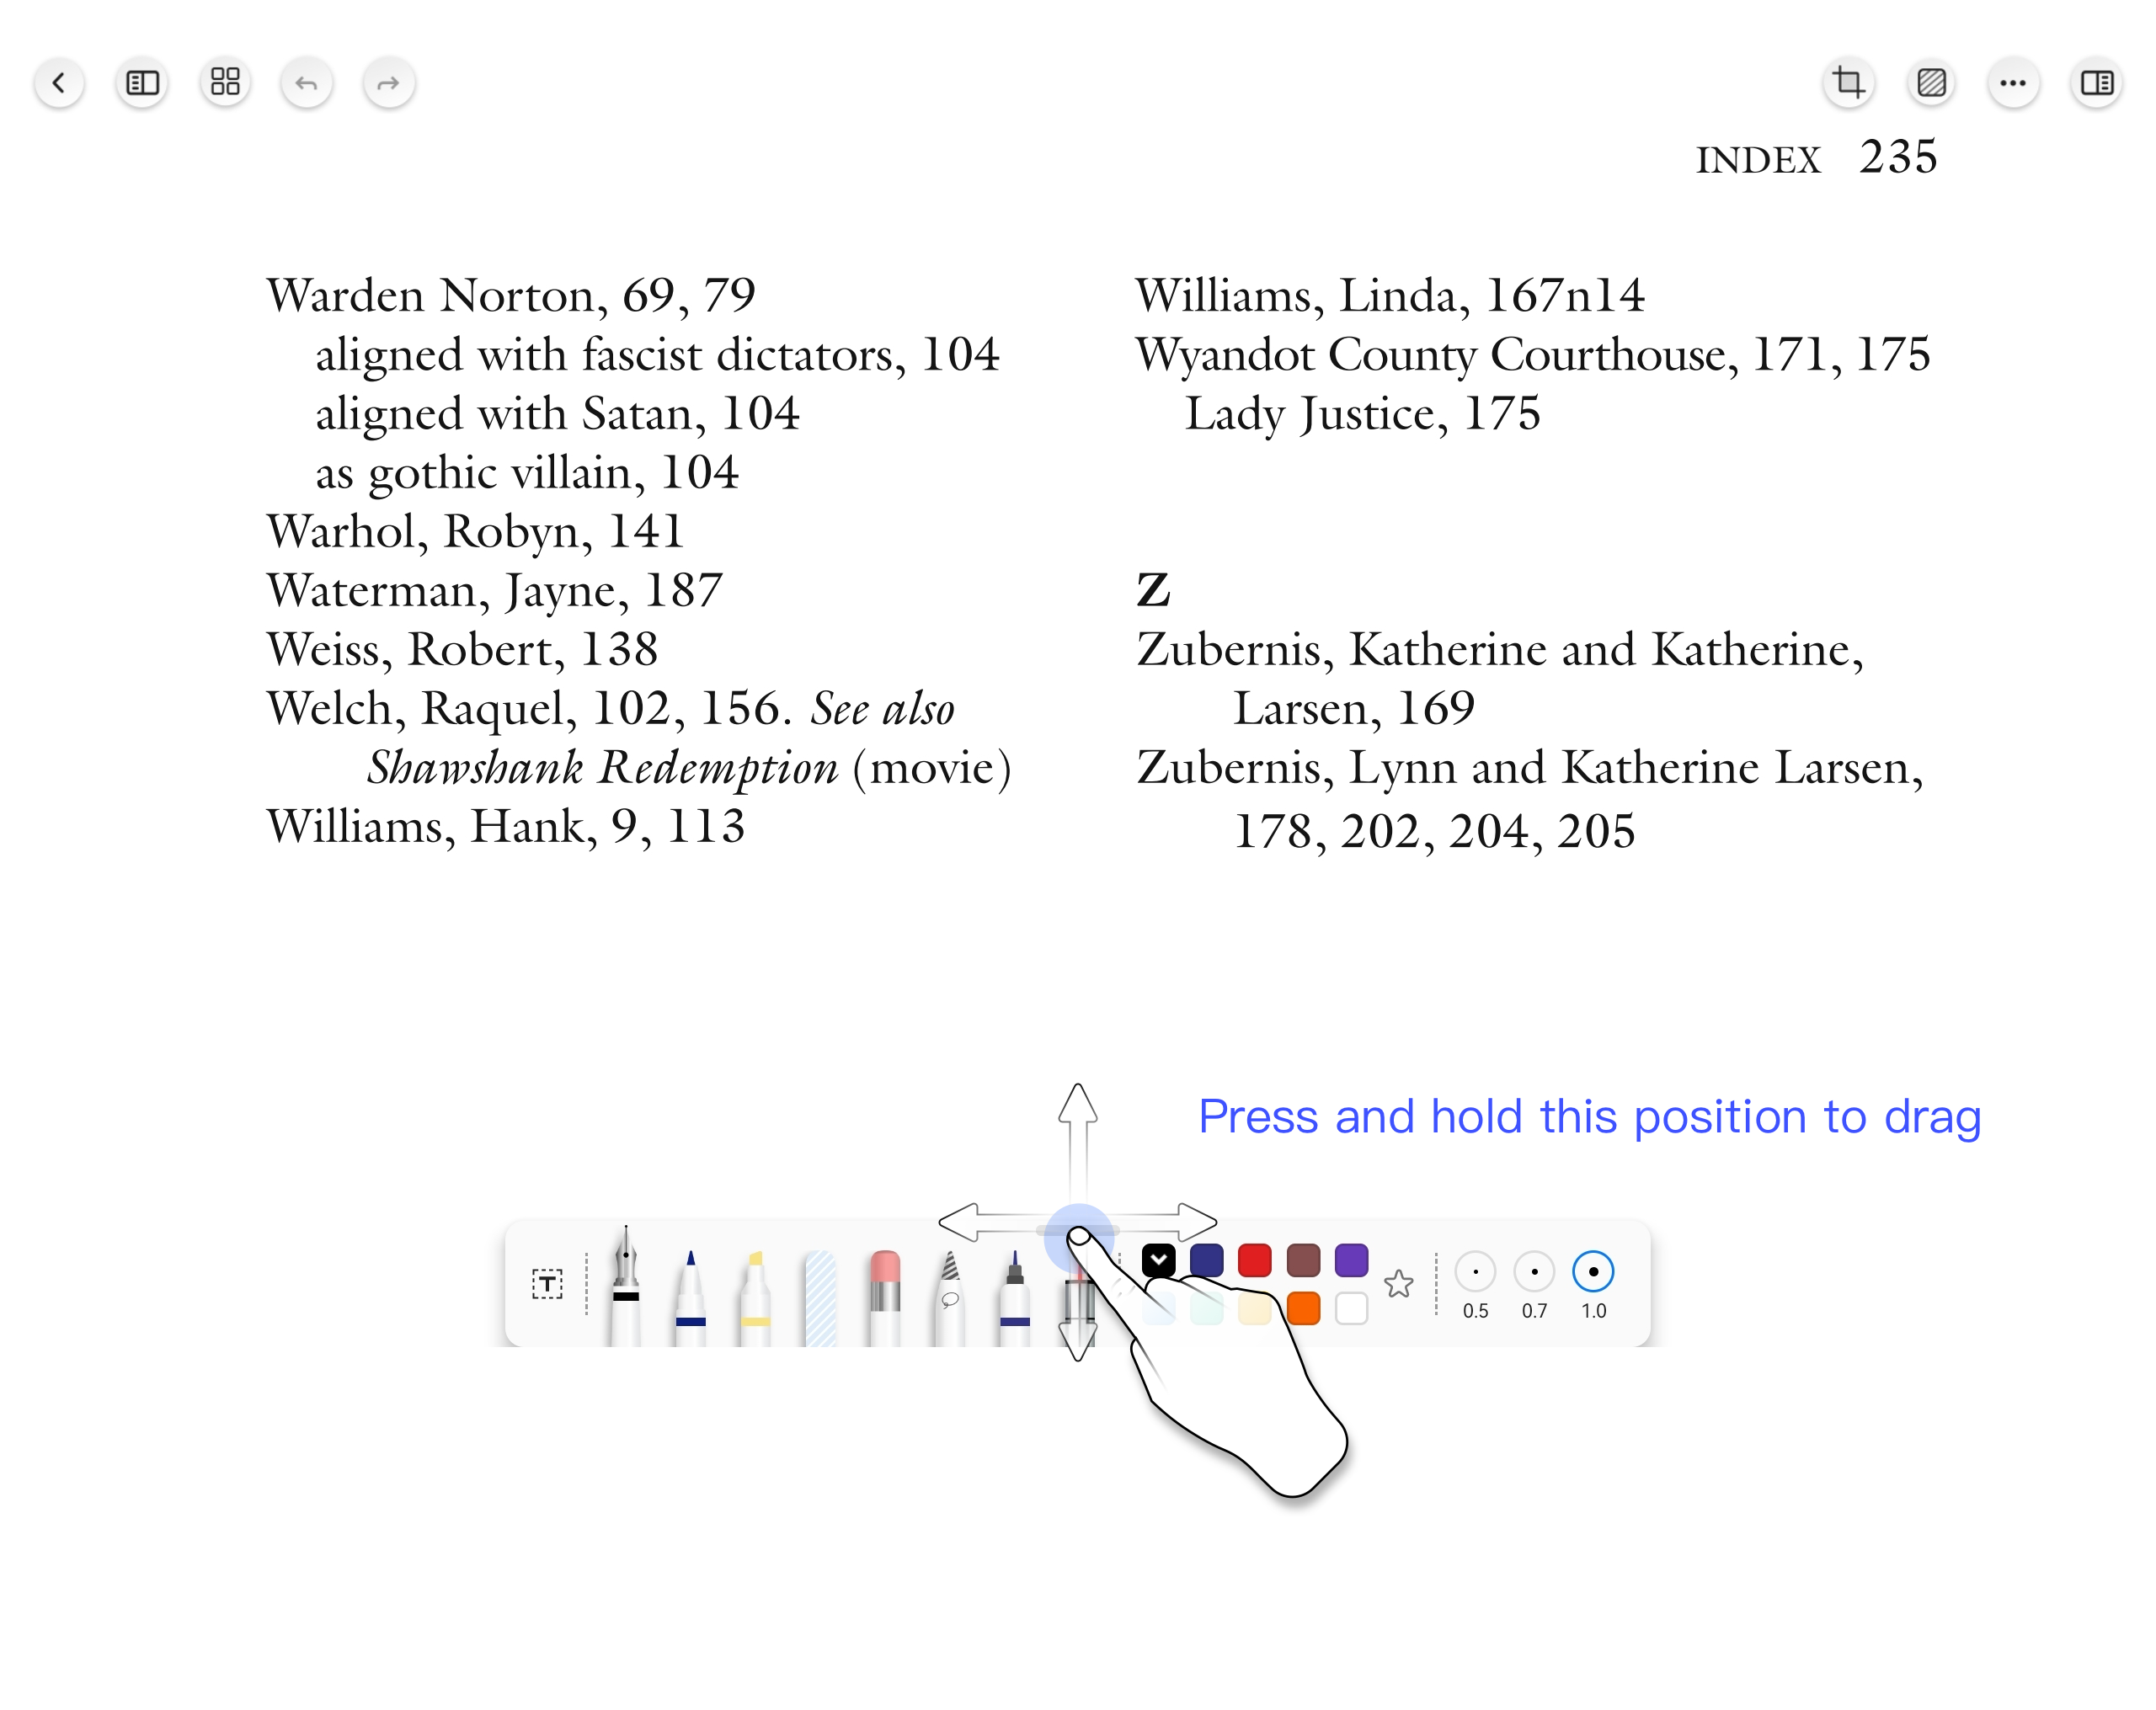
This way, you can easily control the visibility and placement of the ToolBox based on your preferences.
To adjust brush parameters in Notein, follow these steps:
1. Open the ToolBox and select the "Pen" tool.
2. Tap on the "Pen" tool again to open the brush parameter adjustment window.
3. In the brush parameter adjustment window, you can customize the pressure sensitivity and ink flow speed for the pen. The pressure sensitivity can be adjusted from 0% to 200%, with the default setting being 100%. The ink flow speed can be adjusted from 0% to 100%, with the default setting also being 100%.
4. Slide the adjustment sliders left or right to change the pressure sensitivity and ink flow speed according to your preference.
5. Once you've set the parameters as desired, tap outside the adjustment window to close it.
These adjustments allow you to tailor the pen's behavior to your own writing style and preferences, giving you greater control over your digital writing experience in Notein.

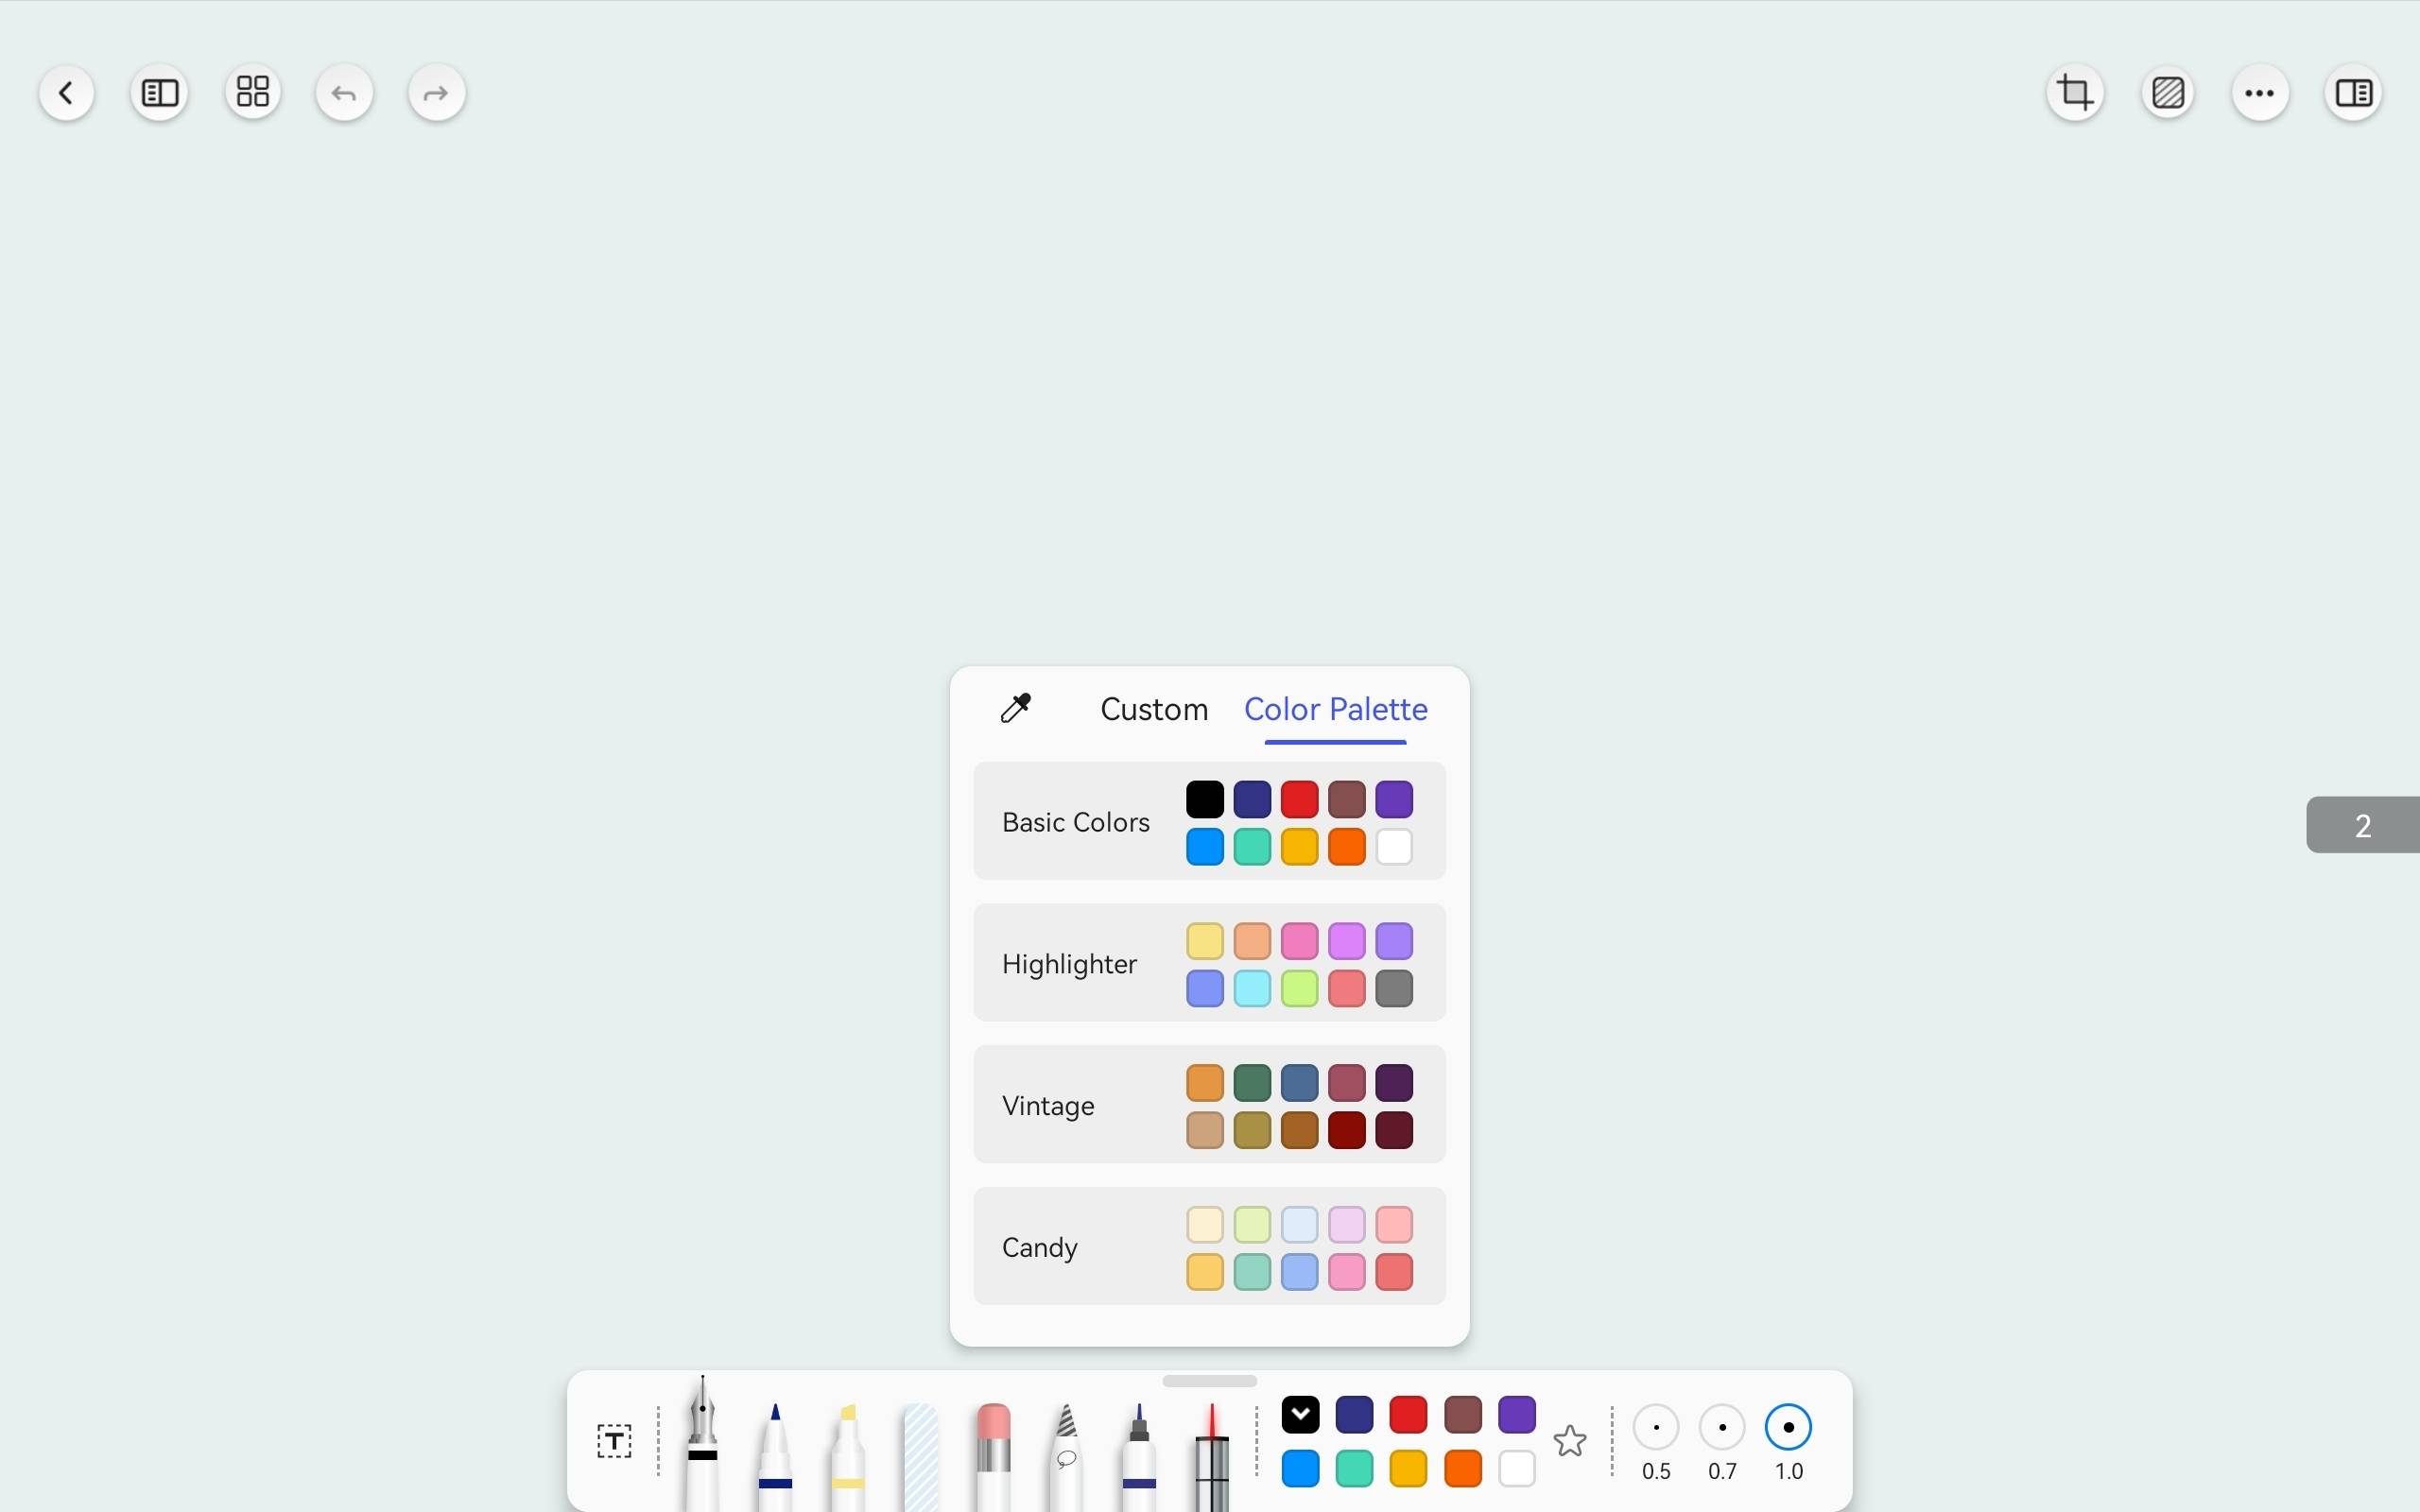
Palette and Color Sets:
To change colors, you can double-click on any color block to open the color picker;
Notein's color picker supports eyedropper color picking, custom color values, and color sets;
After you've finished setting the colors on the palette, you can click the "⭐" button on the right side of the palette to add this palette (including ten colors) to your custom color set, making it easier for you to select your favorite palette next time.
To delete a previously added color set, simply long-press the color set with one finger to bring up the delete button for removal.
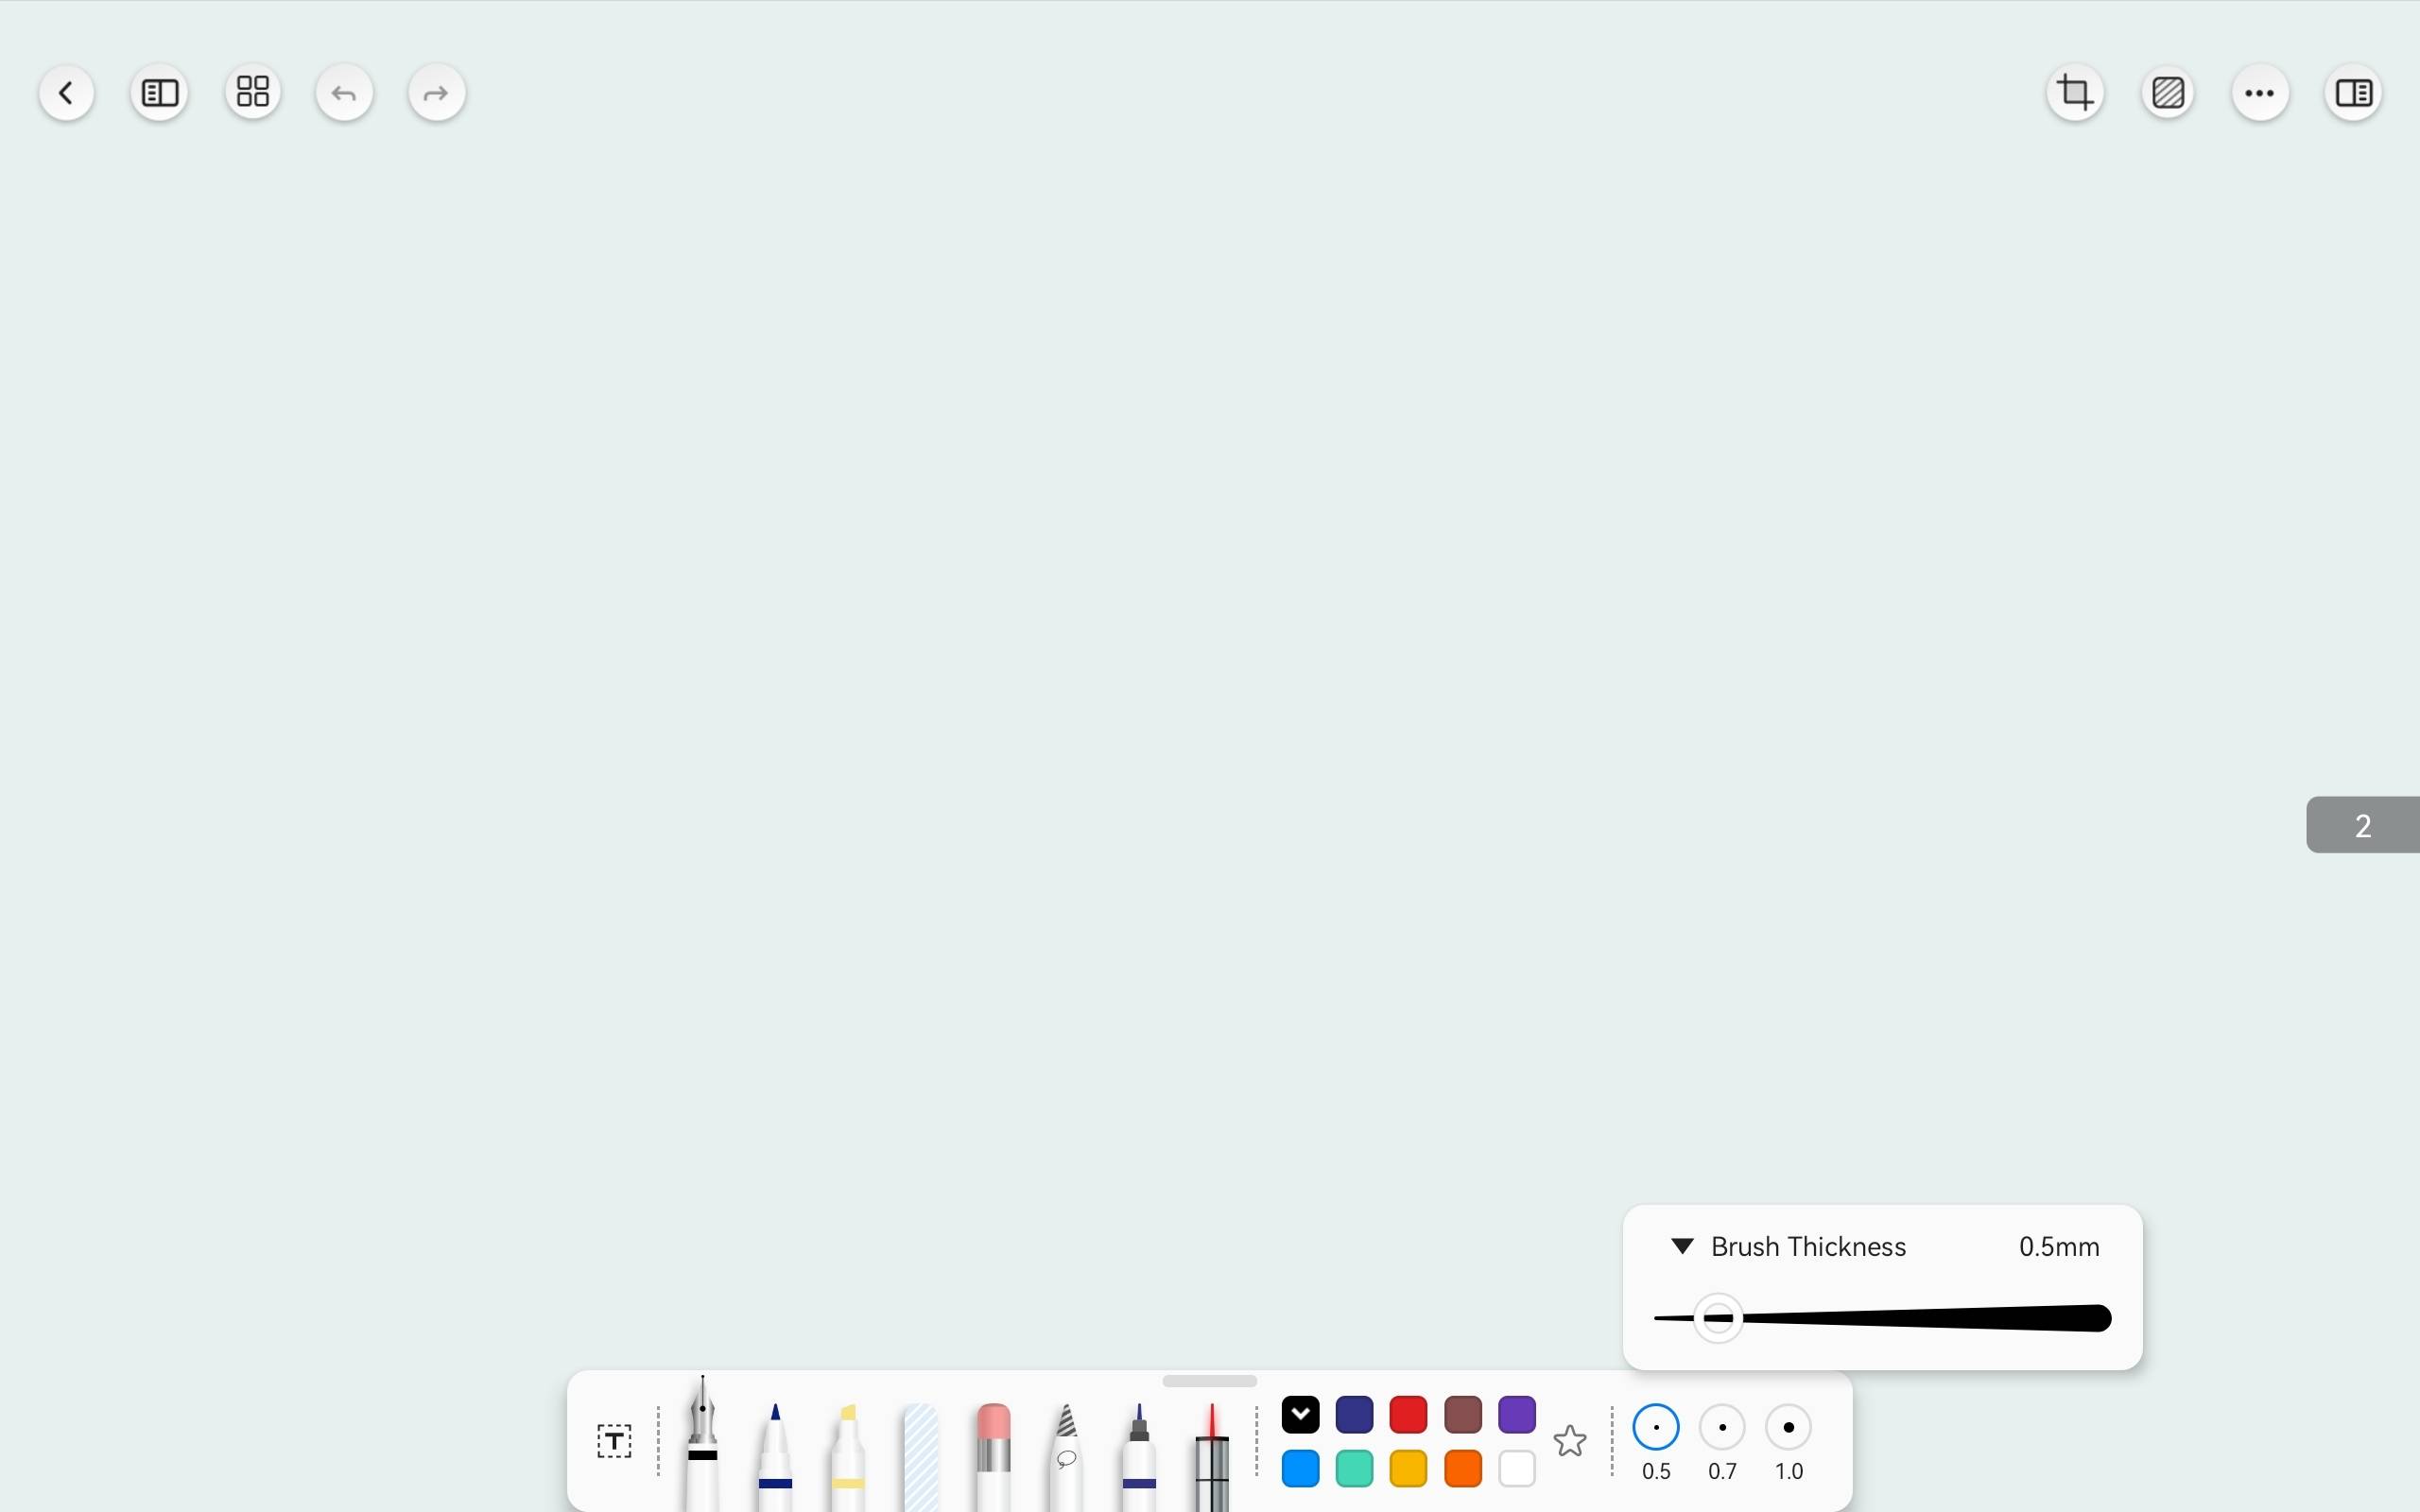
Adjusting Brush Thickness
To meet your needs for various brush thicknesses in different scenarios, Notein allows you to freely adjust the brush thickness within a range of 0.2mm to 3.0mm.
In the toolbox, each brush preset has three preset brush thickness settings. To adjust the brush thickness:
1. Select any brush tool from your toolbox.
2. Tap the same brush thickness option again. This will display a brush thickness adjustment slider.
3. Slide the slider left or right to change the brush thickness to your desired level.
4. The selected brush thickness will be automatically saved as the brush's current thickness setting for future use.
This feature makes it convenient for you to switch between different brush thicknesses based on your preferences and needs.
Different pens' coloring methods:
The colors of the pen, ballpoint pen, and marker can all be set with opacity. The difference lies in the fact that the semi-transparent colors of the pen and ballpoint pen will appear on top of existing content, with overlay and masking effects. In contrast, the marker, whether set to semi-transparent colors or not, will not mask PDF content or the strokes of the pen and ballpoint pen, meaning it has an overlay effect but will not cover existing content.
Please note: Since the marker does not cover black, it may not be visible when writing on black paper. If you need to highlight on black paper, please use a ballpoint pen with semi-transparent color settings for highlighting.
Setting up the eraser:
Notein provides two erasing methods: pixel eraser and stroke eraser. The pixel eraser erases individual line segments, while the stroke eraser erases entire strokes.
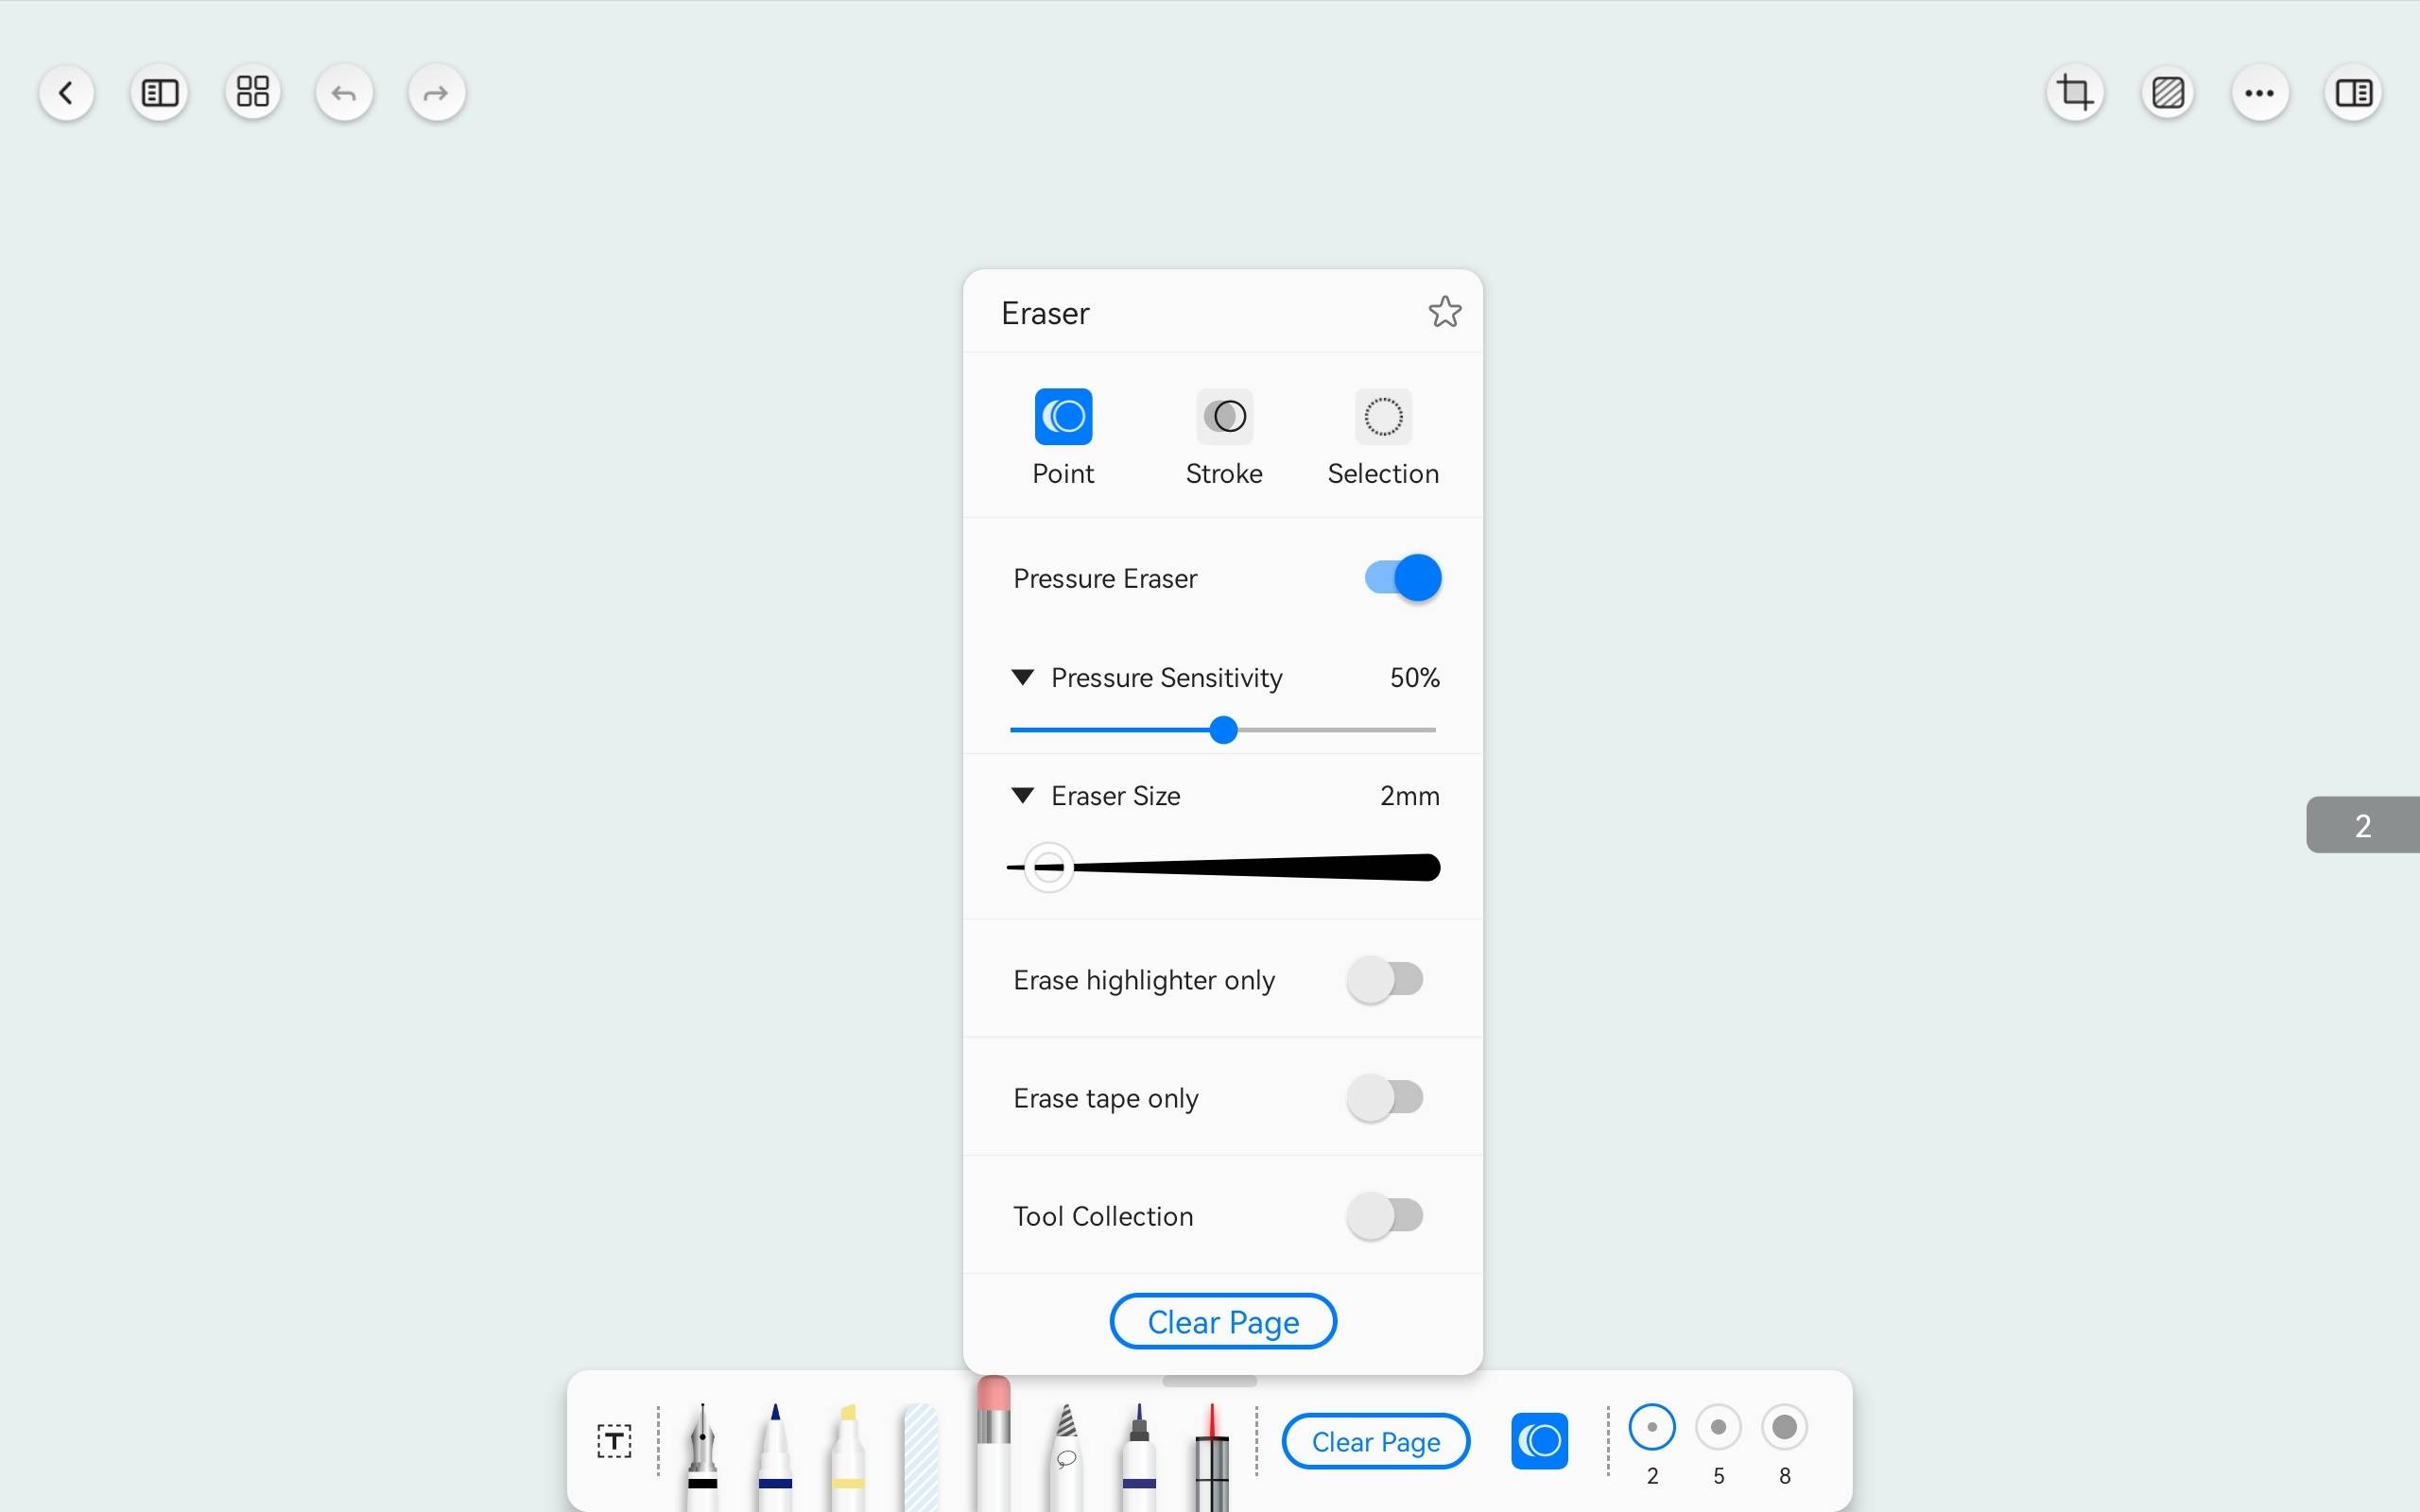
Setting up pressure-sensitive eraser:
In the settings menu (or the right sidebar in the editing page), turn on the "Pressure-sensitive eraser" toggle. Afterward, you will be able to switch to the eraser by tapping the screen while writing.
You can also adjust the pressure sensitivity of the eraser in the settings. A value of 0 means no pressure sensitivity, while a value of 100 represents maximum pressure sensitivity. Notein strongly recommends setting the pressure sensitivity between 50% and 90%.